Jae Nam, Director of Business Development EMEA at Blocko, published an interesting article about how to set up the Athena IDE on ATOM, writing a test contract, account creation, performing transactions, and deploying and installing contracts.
You can read this article here: https://link.medium.com/oNo8r6Ts73 or on myaergo.com below:
Athena -IDE- Atom-Part 2
In this section we will show you how to set up the Athena IDE on ATOM, writing a test contract, account creation, performing transactions, and deploying and installing contracts. Read on to get started!
Installation Notes
- Install Atom here
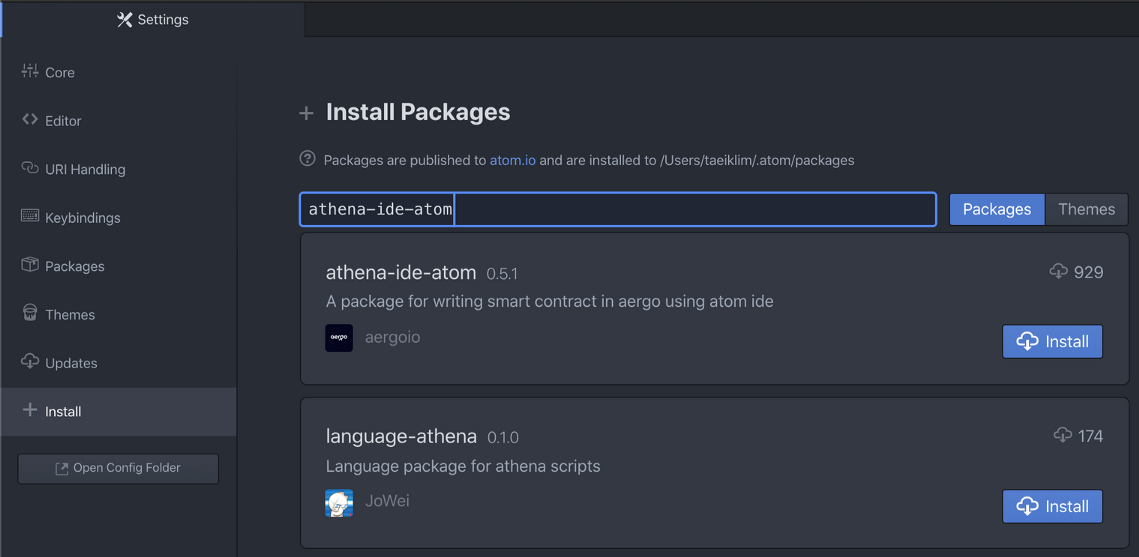
- Install Package
Click Ctrl (Command on mac) + → Click Install → Search Athena-ide-atom → Click Install button.
After installation is complete, Click Packages → Click Athena IDE → Open Athena IDE Panel
Writing a Test Contract
After creating a test.lua file, copy the following contents:
This code is a contract to obtain and set the value of the state DB.
Account creation and transaction
You can set up a network and an account. In this example, we will test sending a tx using AERGO’s testnet.
Firstly, configure the network to be using the testnet. You can also add another network through ‘New’.
In order to send a contract, you need to create an account. You can create a new account by clicking the New button.
Click the copy button next to the account you created and head over to our faucet at https://faucet.aergoscan.io/ on your browser to deposit AERGO to your testnet address.
You can see 5 AERGO has been deposited after clicking the Sync button on the IDE.
Deploy and install contract
Here is how to deploy the contract on the blockchain network.
Smart contracts are programs that run on blockchain nodes. The operation of Contract is divided into the following: Deploy, Execute, and Query.
- Deploy: Deploy the created contract
- Execute: Change contract’s state DB by executing contract (modified through transaction)
- Query: Query the state DB of the contract
In order to deploy, Compile first by pressing F7 or the Compile button.
To deploy, insert the argument into the compiled target and click the Deploy button. If you set the gas limit as 0, you can deploy as much as you’d like.
If the deployment is successful, the transaction hash and contract address will be displayed. The deployed contract information will be displayed at the bottom of the page.
To execute, enter the arguments and click on the function name. Here we will run the set function.
If you want to check the execution information, enter an argument and run the get function. Just run the function that says get.
Conclusion
So far, we have just written, deployed, and ran smart contracts with lua, the smart contract language provided by AERGO.
The IDE has many more features, such as checking for autocomplete and syntax errors.
For more information on how to run the IDE or to find information, go to the following link.
https://github.com/aergoio/athena-ide-atom — You don’t have permissions to view Try another account
For a guide to writing smart contracts in Lua, check out the following link.
https://docs.aergo.io/en/2.0/smart-contracts/lua/guide.html
Happy coding!

https://waterfallmagazine.com
I’ve read several just right stuff here. Certainly worth bookmarking for revisiting.
I surprise how so much effort you set to make any such excellent informative site.